
Dockermon - Docker Manager / Monitor
Dockermon is a Docker Host Monitor and Management system. It runs from a Docker Image as a container and communicates with the host via socket / HTTP connection. Providing an intuitive and informative utility packed web interface, it was written for DevOps, Software Developers, Docker Fans, Software Engineers or just about anyone who wants to explore Docker from a different perspective than the command line and Docker Desktop.
The Docker Hub Image webfreakeric/dockermon:latest runs self contained and monitors your Docker via the Docker Engine API v1.41 through Sockets and HTTP requests.
Dockermon has worker jobs that collect stats for analyzing your containers. There’s a backend API that allows you to create, maintain, monitor, manage and do just about anything you need with Docker containers, images, volumes, networks, and various aspects of your Docker setup.
Multi and Remote host control and monitoring is also possible!
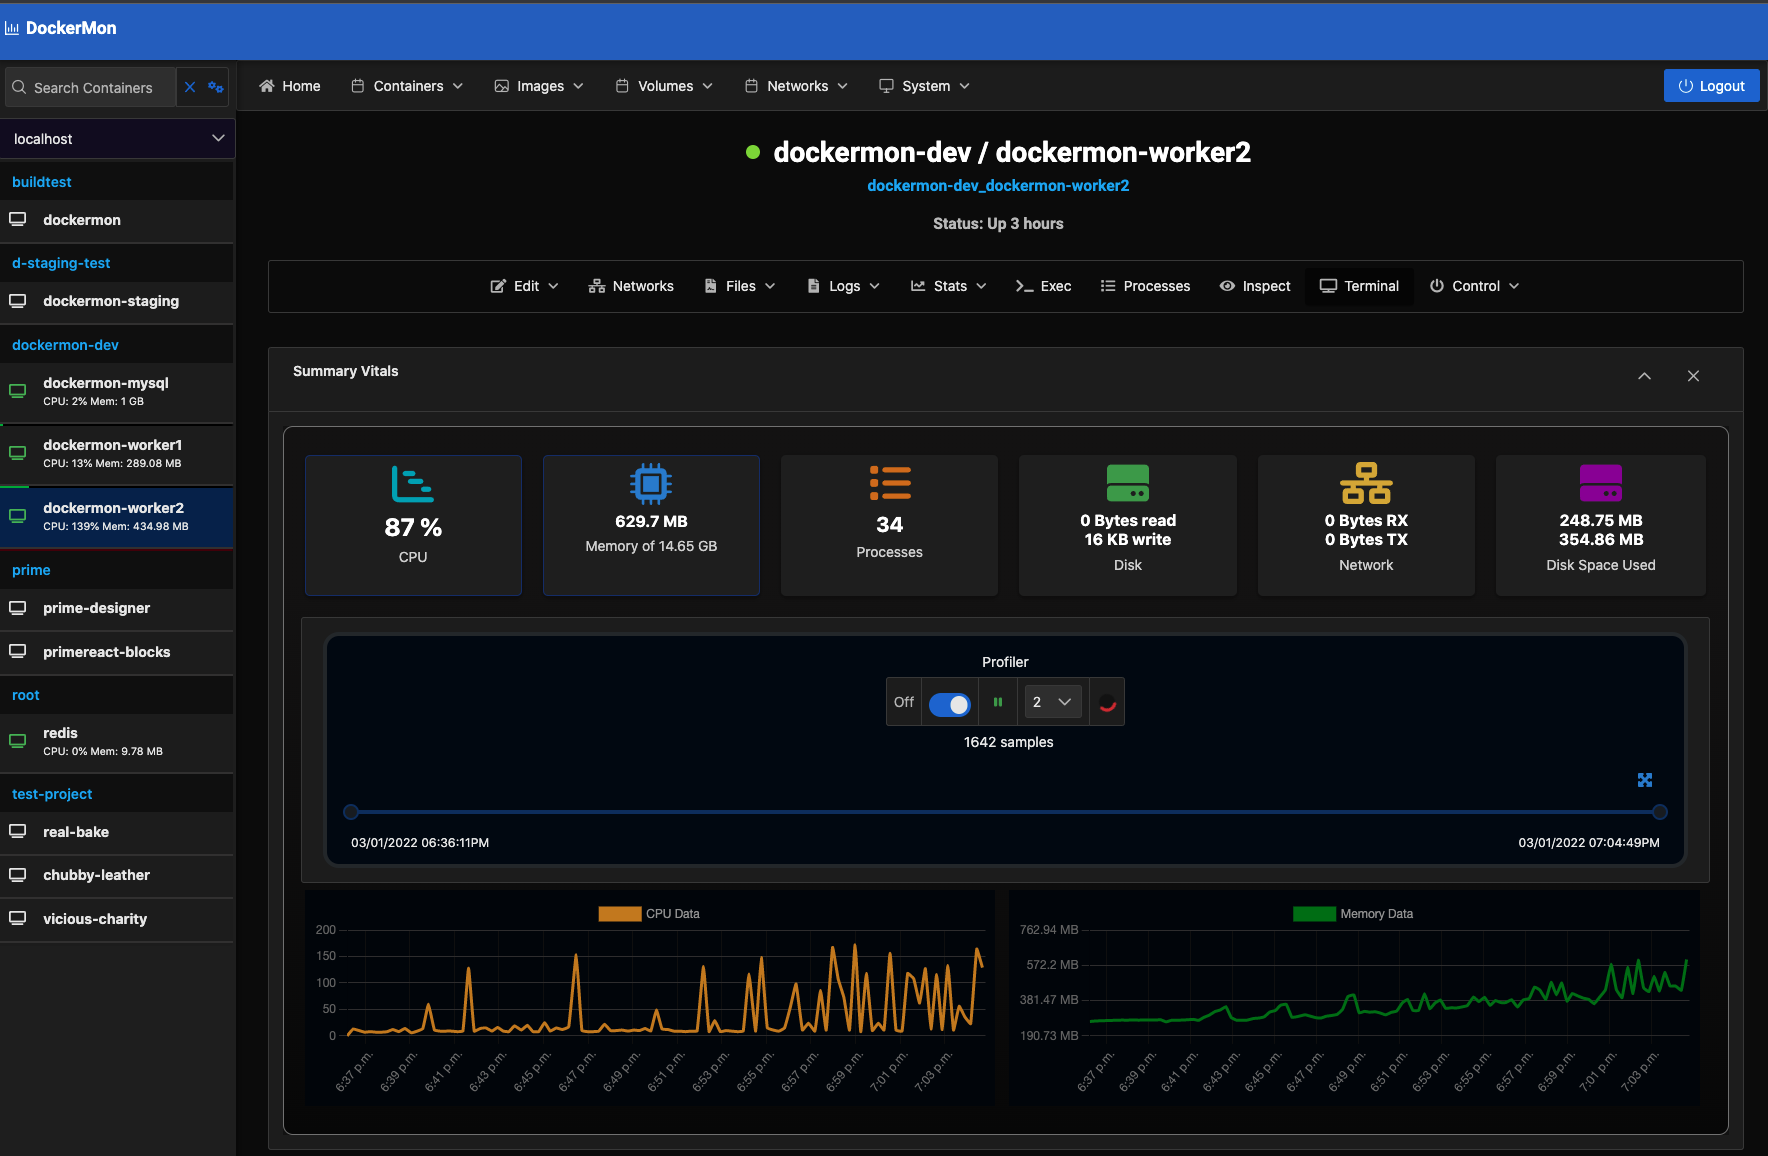
Dockermon provides you with a blazing fast React/Next web interface to manage and view your docker system. The web interface is secure and meant to be accessed locally.
Dockermon Host Launcher (optional) is a companion app to mimic the launch Terminal, Finder, VS Code functionality of the official Docker Desktop app. The Host Launcher is in the source code you’ll download here. The web interface creates a secure socket connection to the and launches commands on your local machine such as Launch Terminal to attach to containers, watch logs via terminal and more.
Read more:
Getting Started - Installation
1. Install Docker and NodeJS
Start the Docker Engine. Tune your settings. You do not need to do anything with Node at this point.
Feeling Lucky? Jump to Quick Install (It’s a really good idea to read below first!)
2. Clone this Repo
The first step is to start off in terminal in a directory and clone this repo as follows:
git clone https://github.com/drumfreak/dockermon.git
cd dockermon
cp .env.sample .env
Now you’ve got the code. Let’s do something with it.
3. Create Dockermon Docker Container
The easiest way setup your dockermon container is to git clone the repo as mentioned in Step 2 and run docker-compose.
Dockermon will expose the following ports. However, MySQL, Redis, and other service ports will be closed and only used internally.
| Port | Service |
|---|---|
| 3800 | Dockermon Frontend Web Port http://localhost:3800 |
| 3810 | Dockermon Nest HTTP Api http://localhost:3810 |
| 3811 | Dockermon Nest Websocket Api ws://localhost:3811 |
| 3801 | Optional Dockermon Host Launcher Port Run by this source code, not the container ws://localhost:3801 |
The default settings are for Mac OS and Linux. You will need to modifiy your
DOCKERMON_DOCKER_LOCAL_SOCKETin the .env if you’re using Windows.
Let’s get the Dockermon container running. Assuming Docker is running, you have the code and are inside the dockermon directory from Terminal, run:
docker-compose -p "dockermon" -f docker-compose.yml up --detach
That didn’t work? Docker must be running to create the dockermon container.
Now Dockermon should be launched and you can see it running in docker. Once the container launches it will install node_modules for the frontend and backend separately. This is going to take a few minutes and only runs the first time. The MySQL database will also initialize, create the tables, and the backend and workers will launch. Everything will fire up.
Be patient. Give Dockermon a good 5 minutes to build, start up and start collecting stats.
The good news is all of the node_modules and database directories are stored in Docker volumes, so if you reinstall or recreate the container, it can pick up the existing volume and resume where you left off unless you delete the Docker volumes or prune ununsed.
Login to Web Interface
Once you see the backend colorfully logging, you can access the web interface at http://localhost:3800
The initial login details are as follows:
| Login | Credentials |
|---|---|
| username | whale@dockermon.com |
| password | dockermon |
4. Optional Host Launcher
What is this? - Dockermon Host Launcher - Mac OS is a utility Nest JS web socket server app that runs on your host machine for the web interface to mimic Docker Desktop launch Terminal, Finder and docker commands and etc. This only works on the local machine and exposes port 3801 by default. If you are remote monitoring a Docker instance you will not be able to launch terminals, open folders, etc.
Windows implementation of this host launcher will be available in future releases.
This code is Open Source and available in this repo for your sanity. Or read here.
To run the code in the git clone earlier, inside the dockermon diretory, run:
npm install
npm run build
npm start
Tip add an & at the end of npm run start: npm run start & if you wish to run the host launcher in the background. If you wish to watch the output of the Host Launcher, run npm run start instead.
You should now see docker host launcher running on port 3801. You can change this port but it is not recommended.
Quick Install
This section was purposely placed at the bottom in hopes you have read everything above.
You have Docker running. Node installed. Open Terminal. cd to your favorite directory.
Quick install only works for Mac OS and Linux. You will need to modifiy your
DOCKERMON_LOCAL_SOCKET_PATHin the .env if you’re using Windows.
git clone https://github.com/drumfreak/dockermon.git
cd dockermon
cp .env.sample .env
docker-compose -p "dockermon" -f docker-compose.yml up --detach
npm install && npm run build && npm start
You should now have Dockermon running in Docker and the interface will be ready in about 3 - 5 minutes after node_modules installs and the workers have had a chance to assess your system.
Parting Notes
This is not meant for production environments although you can connect to any Docker host that has the Engine API ports exposed. This is in the early development stages. In other words, use at your own risk, do not use it in production!!
Enjoy! Eric Rosebrock
Read More
- Dockermon Features
- Dockermon Inspiration
- Dockermon Backend Details
- Dockermon Frontend Details
- Dockermon socat Socket Pipe
- Dockermon Container Image Build
- Dockermon Container Init Process
- Dockermon Container Github Updates
- Dockermon Remote Host Management
- Dockermon Host Launcher - Mac OS
- Dockermon FAQ
Backend built with: Nest, Node.js, TypOrm, Nest Bull, SocketIO
Frontend built with: React, Next.js, PrimeReact, Redux, SocketIO
License
Nest is MIT licensed.